Changing unit filters
 Change the unit filters when the filter change indicator is on.
A pending filter change is displayed on a main control unit (if the status display is switched on under basic settings). On the RLS 1 WR control unit, the LED of ventilation level II flashes regularly at longer intervals.
Recommendation: Change the unit filters together.
- Switch off ventilation unit.
1
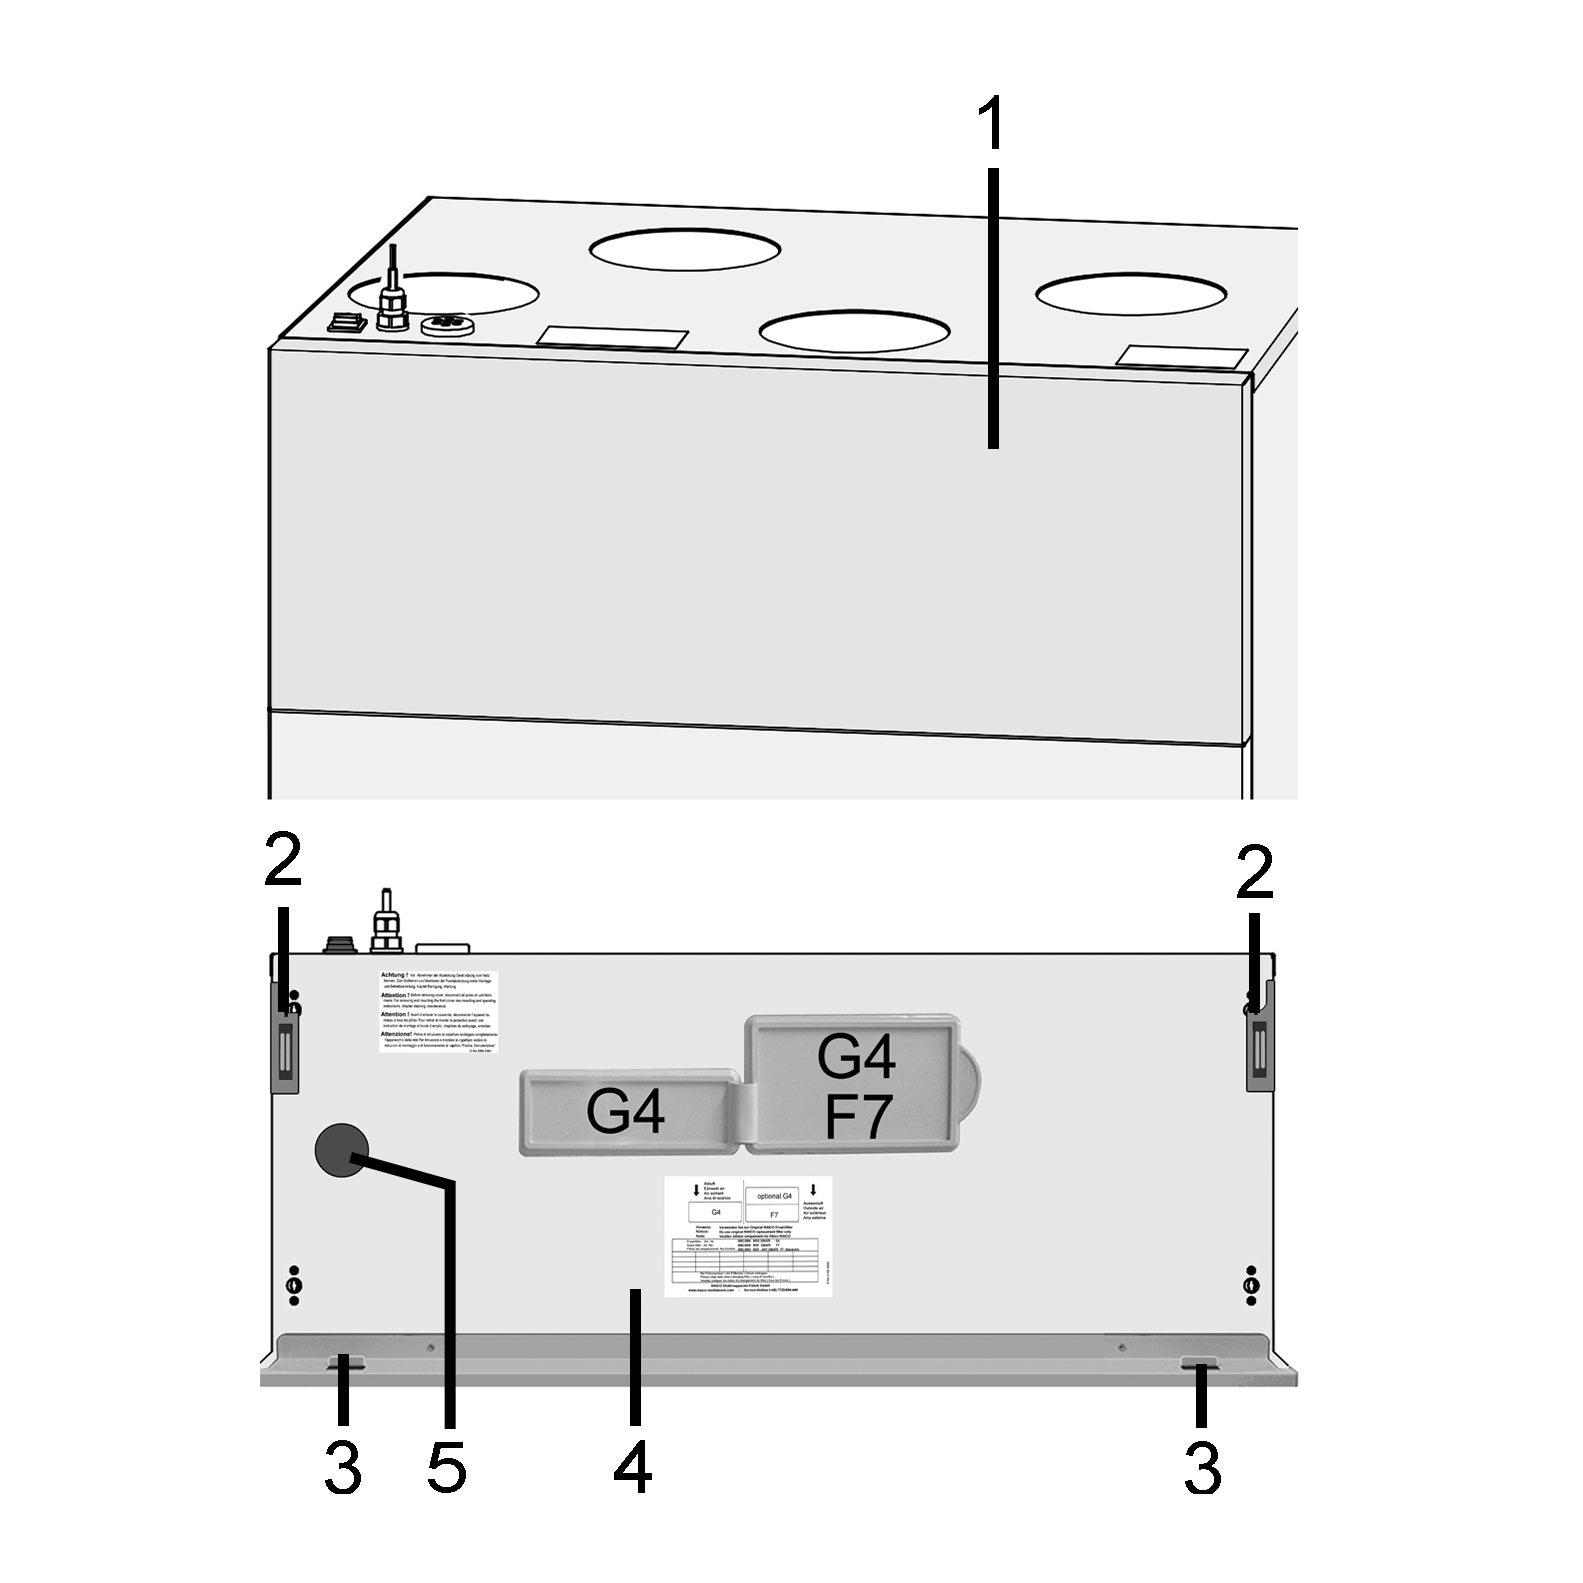
Front panel
2
Magnet
3
Tab
4
Front cover
- Tilt front panel forward at the two top corners (magnets) and remove it upwards.
- Remove filter cover [G4 or F7].
- Pull the unit filter out of the ventilation unit.
- Carefully slide the new unit filter into the filter shaft. Do not press in the unit filter (cellulose). Only press in at reinforced corners. Air direction arrow facing down.
- Close filter openings with filter covers.
- Fit front panel in the two lugs and close (magnets).
- Reset filter change interval. To do this, click on the message on screen and confirm the filter change with changed. Also confirm a premature filter change with "changed". For systems with a single RLS 1 WR, press the two arrow keys on the control unit together for 2 seconds. The 3 LEDs flash briefly. If resetting prematurely, press the keys at the same time for 10 seconds.
- Dispose of the unit filter according to local regulations.