Installing the cover
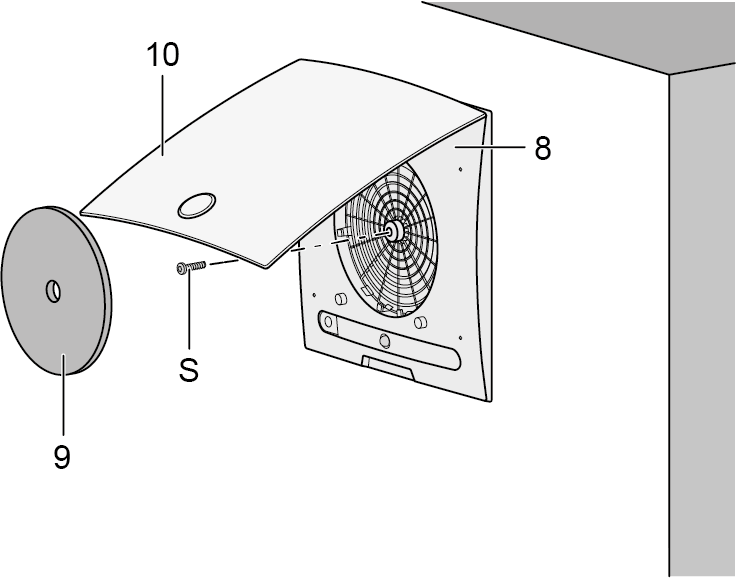
S | Central screw |
8 | Cover – lower part with central screw |
9 | Air filter |
10 | Cover – upper part |
Installation instructions
- Cover can be turned up to ± 5° (to provide compensation if housing is inserted at too much of an angle). If installing on a wall, ensure that the Maico name is in the bottom right.
- If the housing edge is flush with the plaster, use the centre screw to fasten the cover.
- If the plaster protrudes up to 20 mm from the edge of the housing, insert the ER-AR EC cover frame between the wall and the cover. The customer should provide a longer screw (M6 fillister head) to secure the cover.
- If the housing is plastered in too deep, compensate for this with an ER-MR two-part wall frame (can be adjusted between 50...100 mm). This prevents air from being drawn in from the shaft. Use the supplied screw to fix the cover.
- Fold up cover at the recessed grip, place on the housing and secure with the central screw.
- If necessary, first install an ER-AR EC or wall frame cover.
- With second room extraction, insert regulating plate below locking tabs at the side on the intake grille of the cover, insert filter mat.
- Lock cover. The lock must engage audibly.
- Switch on mains fuse, remove warning sign.
- Run function test: Test all unit functions (run-on time, interval, humidity control etc.).
- Affix time strip (supplied with the ER-A cover) and push the activation button [A] all the way. Installation location of time strip, e.g. near the cover.