Fitting the RV 2 AH / AV external covers
RV 2 AH (horizontal) = Accessories for RV 2 VH pre-installation kit
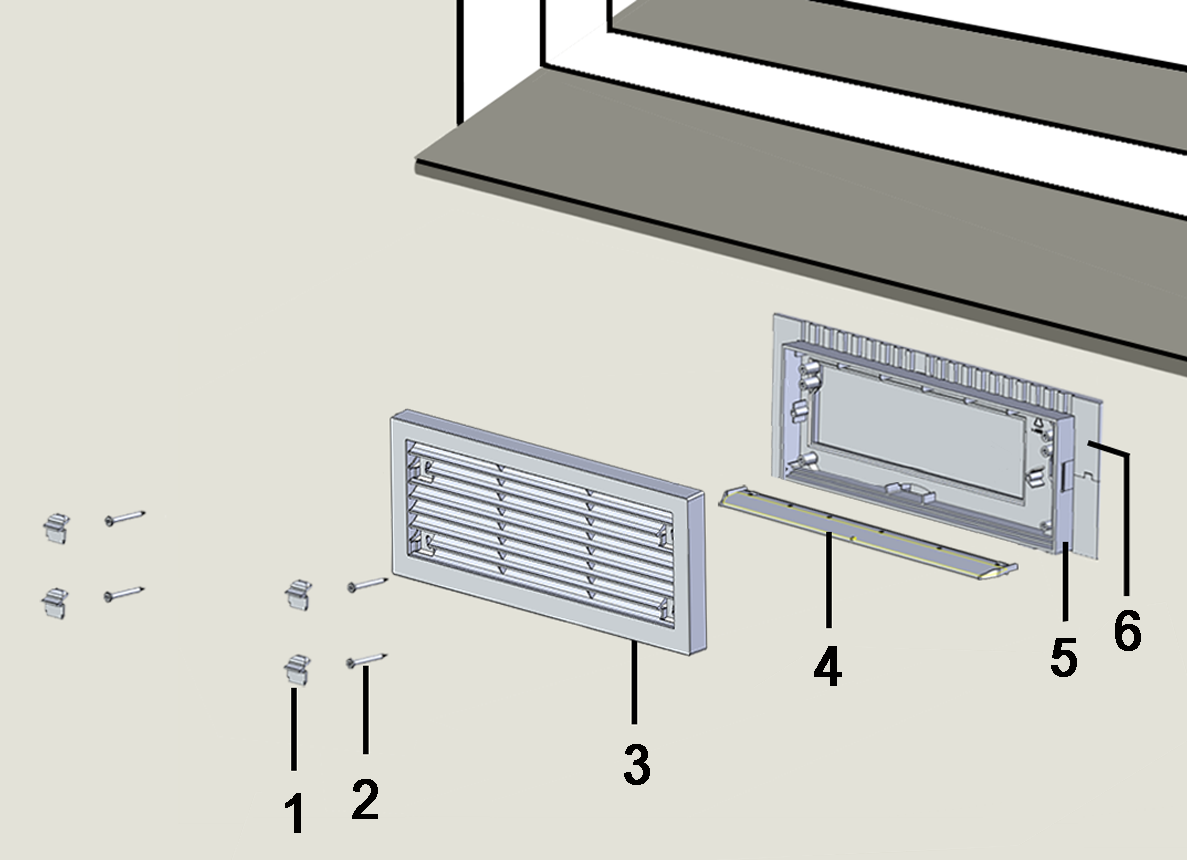
1 | Screw covers (4 pcs.) |
2 | Fixing screws (4 pcs.) |
3 | External grille |
4 | Long drip rail with sealing strip at the bottom |
5 | Plaster frame |
6 | RV 2 mounting sleeve, see RV 2 VH pre-installation kit |
RV 2 AV (vertical) = Accessories for RV 2 VV pre-installation kit
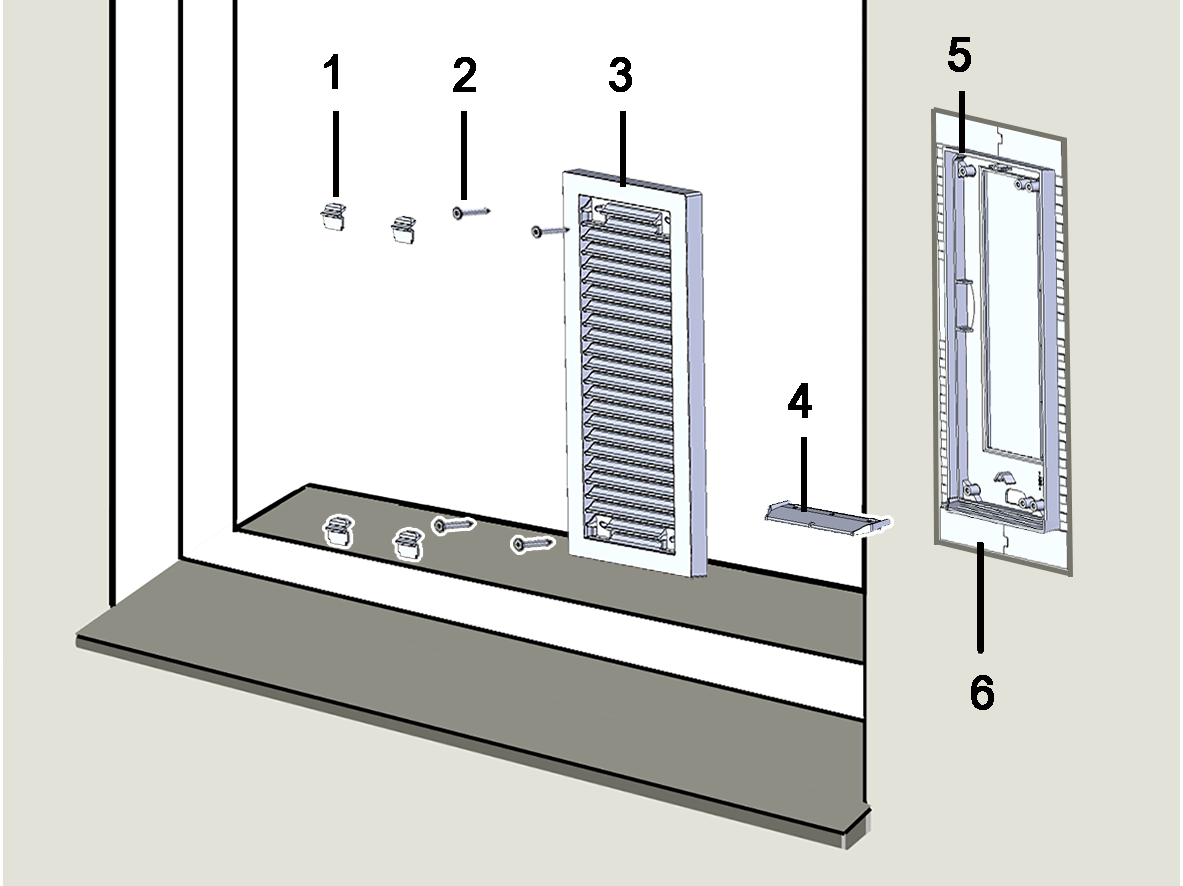
1 | Screw covers (4 pcs.) |
2 | Fixing screws (4 pcs.) |
3 | External grille |
4 | Long drip rail with sealing strip at the bottom |
5 | Plaster frame |
6 | RV 2 mounting sleeve, see RV 2 VV pre-installation kit |
Observe safety instructions!
 CAUTION Risk of injury when handling housing parts with sharp components, e.g. stainless steel external covers. Wear protective gloves.
- Once the external plastering is complete, remove the plaster protective cover. The RV 2 mounting sleeve must be plastered flush.
- Clean the condensate drain of the RV 2 mounting sleeve. The condensate must be able to drain freely.
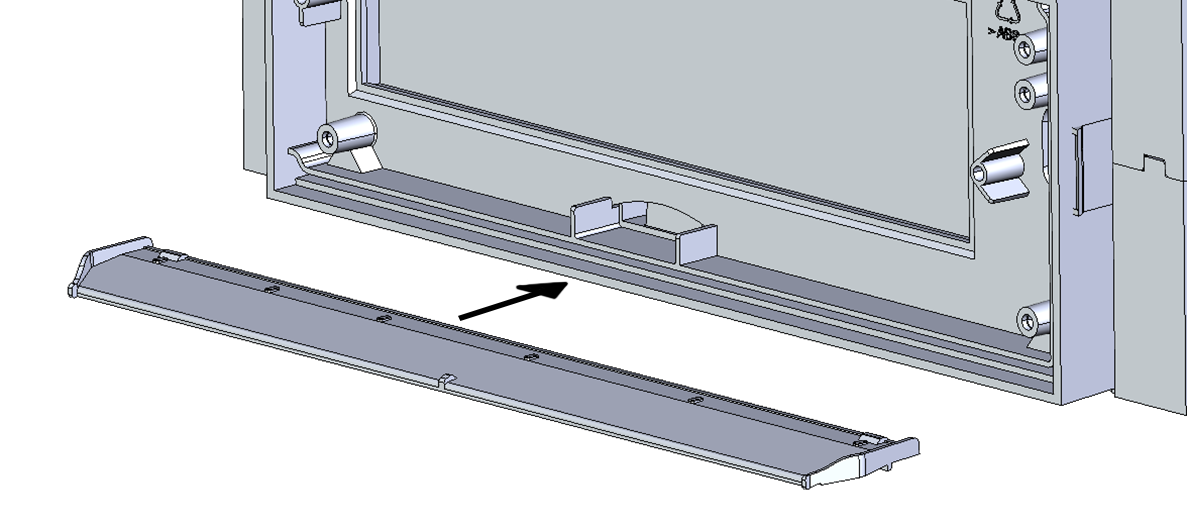
- Slide the drip rail with sealing strip downwards into the plaster frame of the mounting sleeve. It must audibly engage. ATTENTION: Ensure condensate drainage. Condensate must not penetrate between the mounting sleeve and the exterior wall.
- Place the external grille on the plaster frame (drainage openings at the bottom) and fasten with the 4 screws.
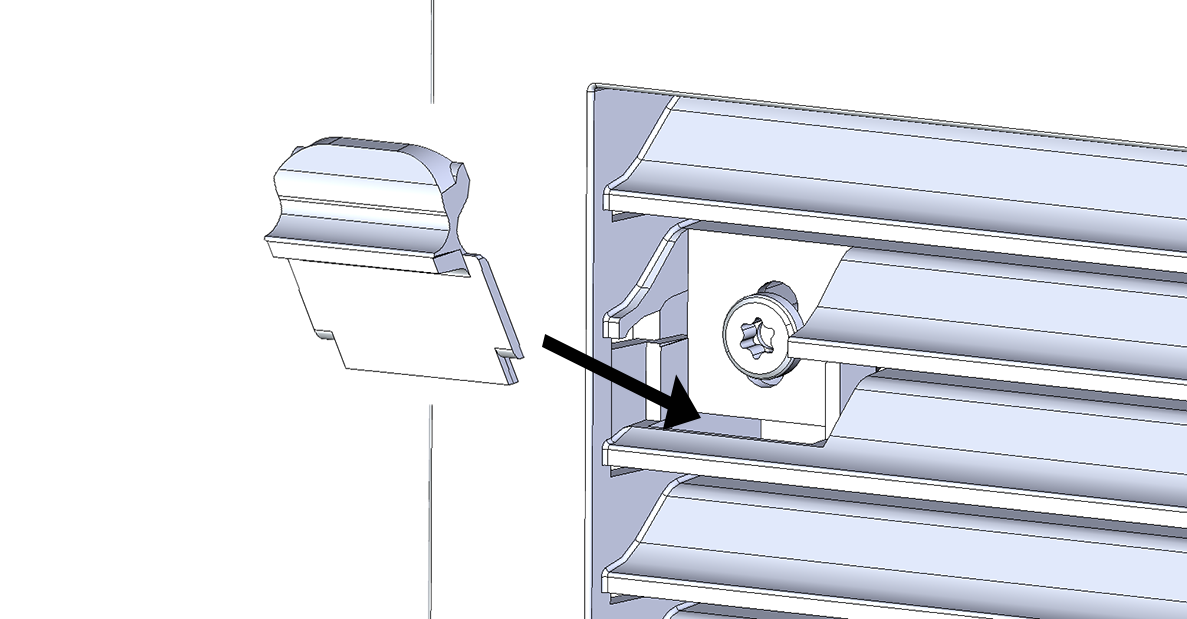
- Fit the 4 screw covers. Insert them into the recesses at the bottom and swivel them upwards until they audibly click into place.
 To remove the screw cover, push the upper slat gently upwards.
- Check and ensure that the external grille is firmly seated.
- Recommendation: Seal the external grille to the exterior wall.