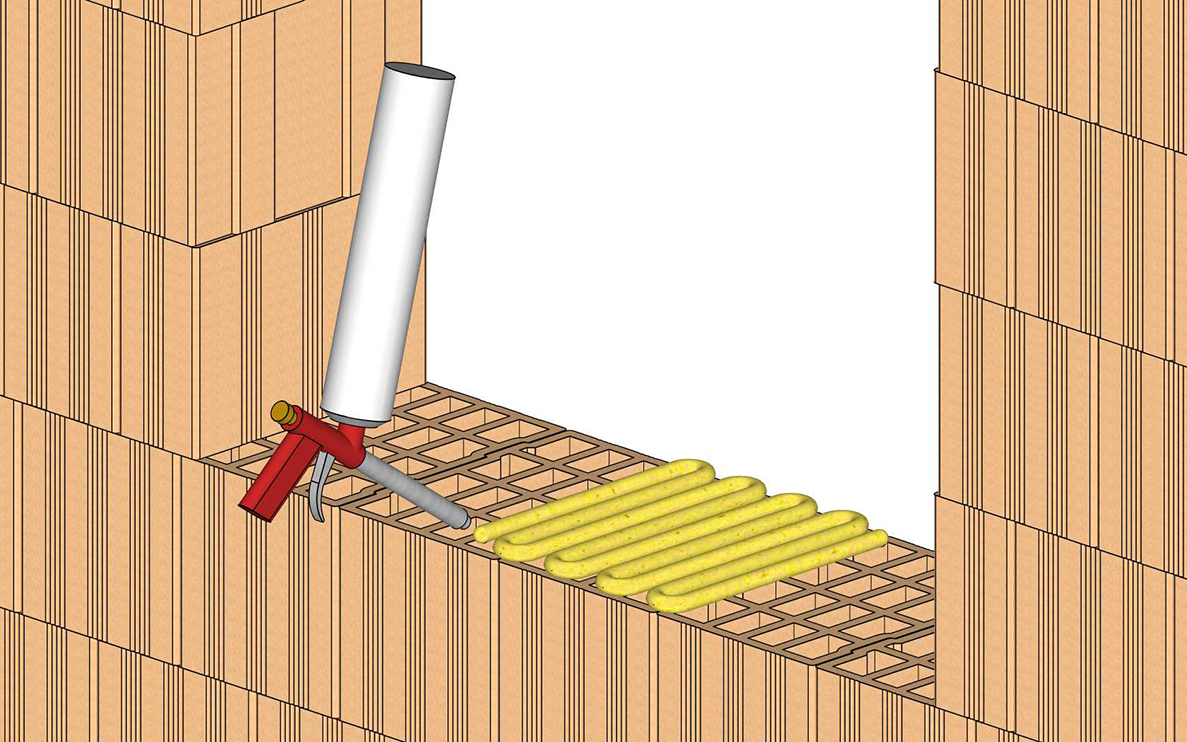
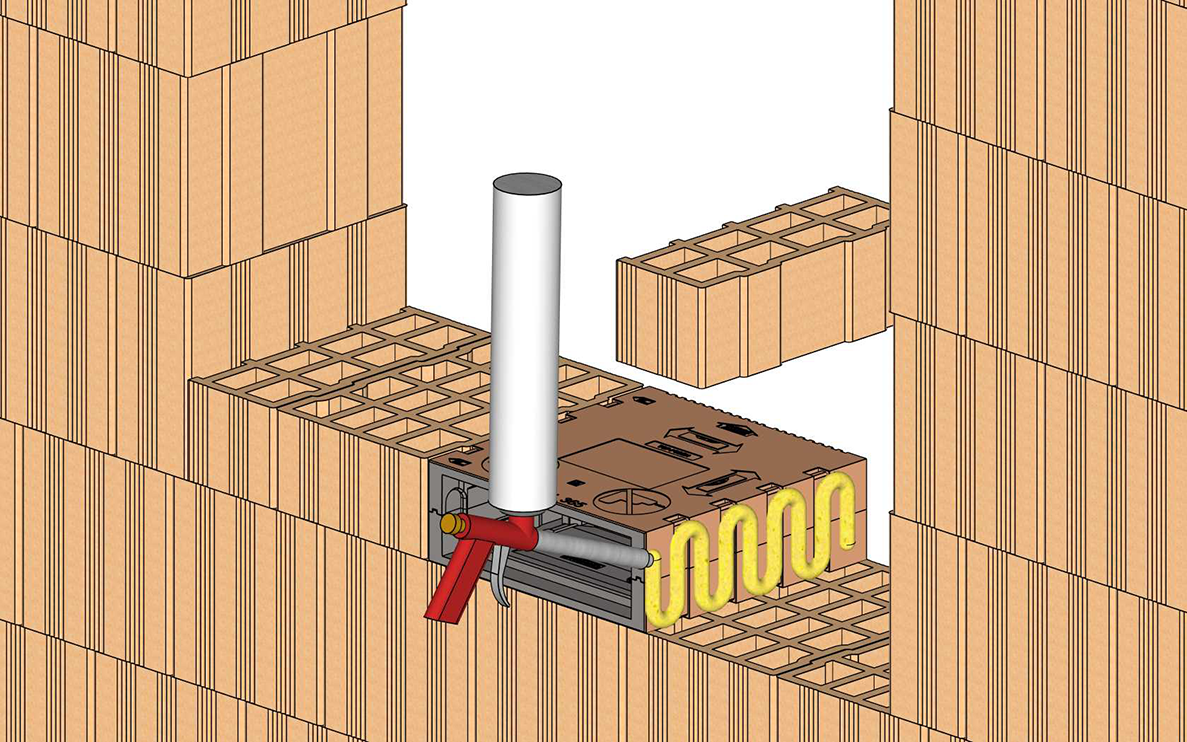
Gluing the mounting sleeve to the masonry
 Maintain minimum distances to other façades and shell components. Observe the dimensions and position of the internal and external plaster frames.
- Apply mounting adhesive to the brick row and mounting sleeve.
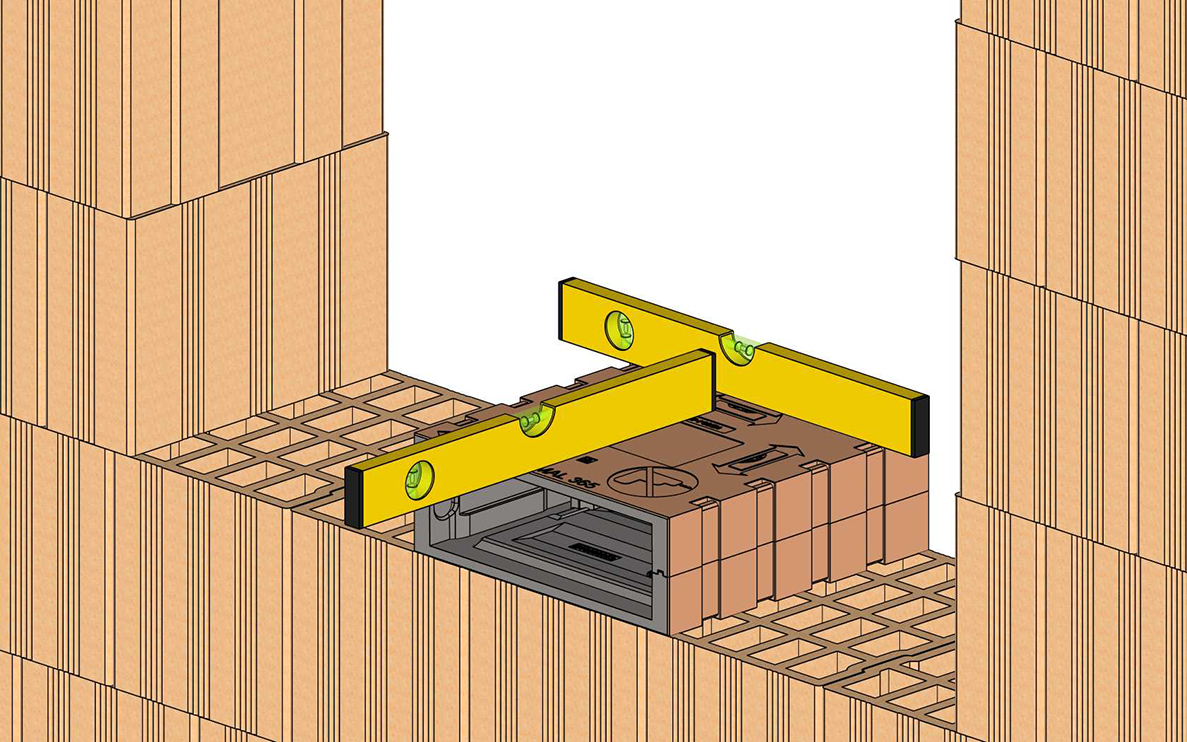
- Insert the mounting sleeve flush with the exterior wall and exactly horizontally (projecting length for external plaster frame 18 mm). Observe a 0° inclination. Ensure that the inclination is precisely balanced in all directions and check with a spirit level. Note the symbols on the mounting sleeve: top, bottom, inside, outside and the position of the spirit level.
Interior wall
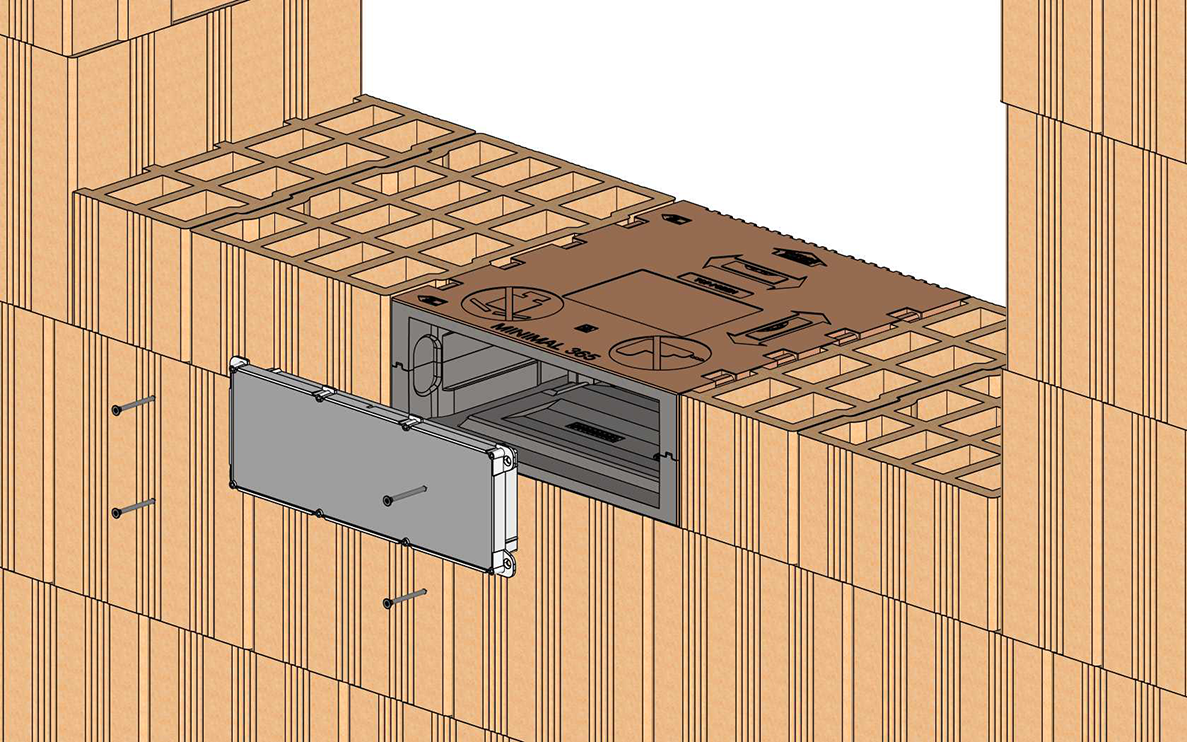
- Check the position of the mounting sleeve on the exterior wall with the rod level. Rework if necessary. Observe the distance for the required minimum plaster thickness "X".
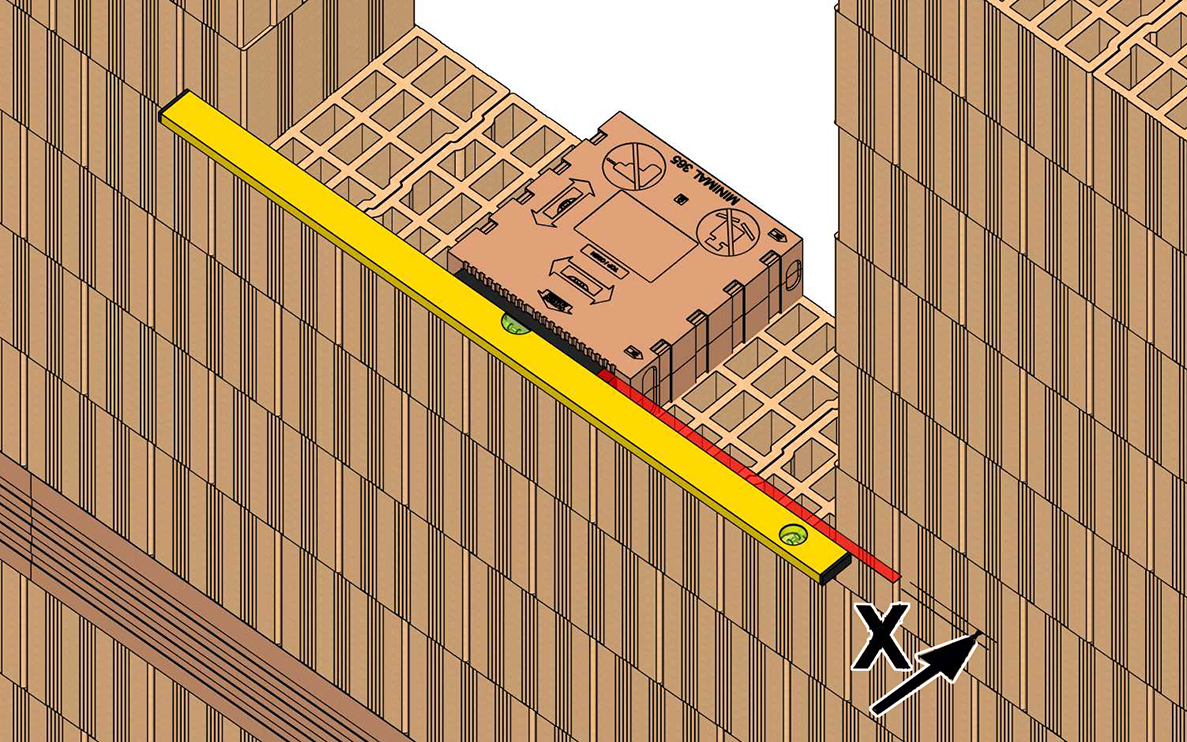
Exterior wall
- Weigh down the mounting sleeve until the mounting foam has hardened.
ATTENTION: Damage to the mounting sleeve if weighted down at certain points. Only weigh down the mounting sleeve over the entire width and the walls. Point loading is not permitted outside the walls.
Interior wall
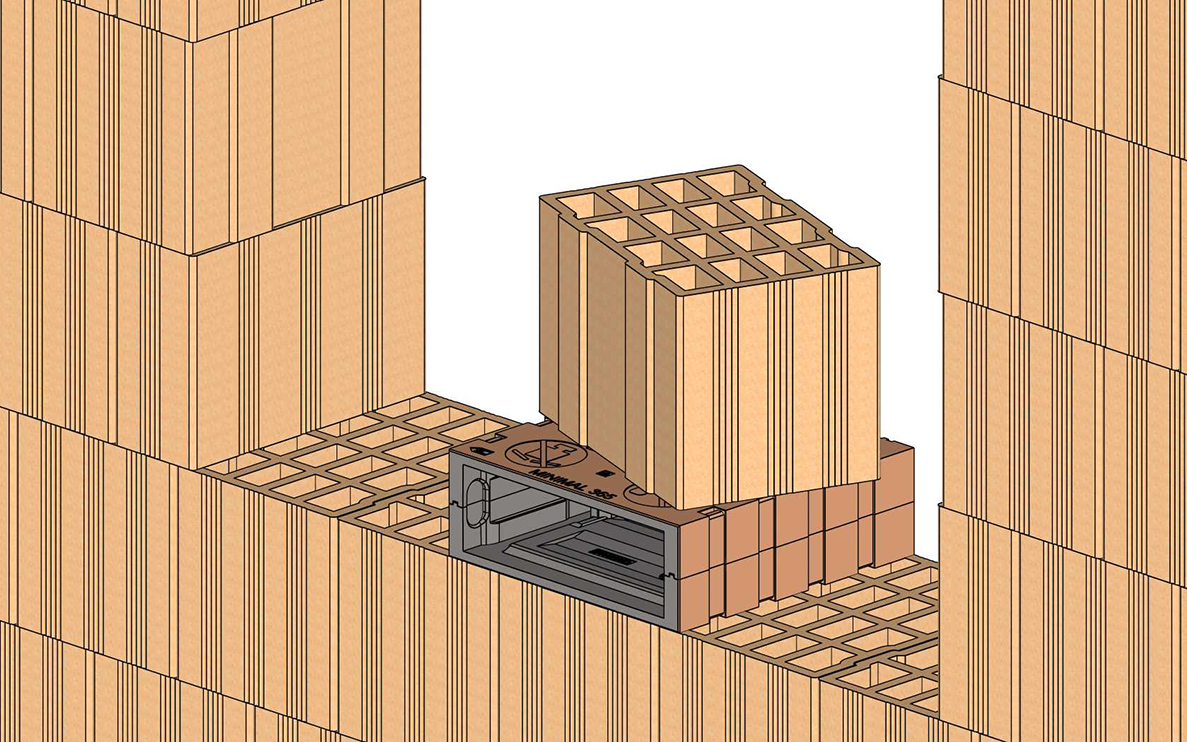
- Brick up the parapet to the same height as the mounting sleeve and glue/foam the mounting sleeve to the side.
Interior wall
- Fit the inner plaster frame: Adjust the frame to the actual masonry thickness and required minimum plaster thickness. To do this, loosen the 4 screws, pull out the frame, place it underneath and screw it back on. The frame can be pulled out up to 15 mm. ATTENTION: Avoid overtightening the screws at all costs.
Interior wall
- Check the position of the plaster frame on the interior wall with the rod level. Rework if necessary. Observe minimum plaster thicknesses.
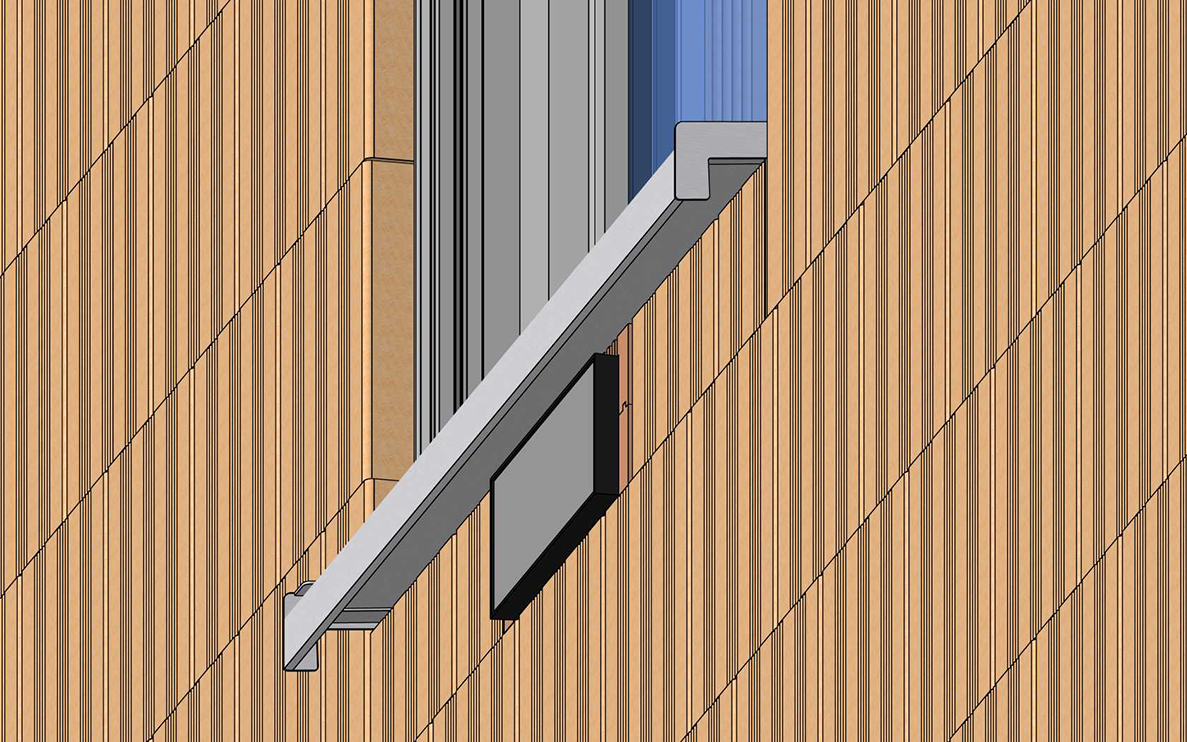
- Ensure that the plaster frames are correctly positioned, aligned and sealed with the plaster protection on the inside and outside. The frames must not protrude from the finished plaster (max. flush, rather protruding inwards).
- Properly seal the top layer of the row of bricks and install the window sill plate (maintain a minimum projection of 40 mm of the outer window sill from the external plastering).
ATTENTION: Building/moisture damage due to faulty sealing and insulation. Carry out all installations in accordance with the recognised rules of technology.
Exterior wall
- Apply plaster, observe required minimum plaster thickness.
Leave the plaster protection inside and outside in the mounting sleeve until final installation.