Cleaning heat exchanger and inside of unit (every 2 years)
- For APA/UPA/UPGA units, remove the front cover (design/glass) and lay it down carefully.
 Glass parts of front covers and control unit are fragile. Risk of cuts in case of damage.
Proceed with caution during installation/removal, especially when units are mounted on the ceiling (Powerbox S). Observe enclosed supplementary sheet `Safety instructions´.
- Open ventilation unit. Note information on sticker.
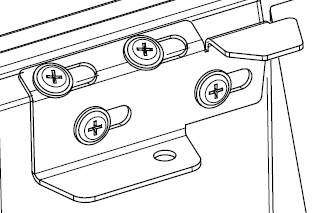
- Take cover off Powerbox (remove 10 screws).
 NOTICE: The sealing strip of the heat exchanger will be damaged if the heat exchanger is pulled out or inserted at an angle. Do not twist heat exchanger.
- For WS 75 Powerbox S, the additional retaining plate must be detached for cleaning the heat exchanger. To do this, grasp the tab on the retaining plate and move it, using a screwdriver if necessary.
Retaining plate locked | Retaining plate unlocked |
|
|

- Carefully and evenly pull the heat exchanger out of the ventilation unit and wash it with a jet spray and, if necessary, soapy water.
- Wipe down the interior walls of the ventilation unit with a cleaning cloth.
- Carefully slide heat exchanger into housing until stop is reached position sticker.
- Fit Powerbox cover and hand-tighten the 10 screws.
- For APA/UPA/UPGA units, insert the design or glass cover at the bottom into the guide of the AP metal shell sheet/UP shell tray and fix it at the top with the locking levers. Ensure that the cover is also correctly engaged.
- Switch the mains fuse on.
- Switch on the ventilation unit.