Changing air filters
 Change the unit filters when the filter change indicator is on.
A pending filter change is displayed on a main control unit (if the status display is switched on under basic settings). On the RLS 1 WR control unit, the LED of ventilation level II flashes regularly at longer intervals.
Illustration example WS 120 Trio LRV
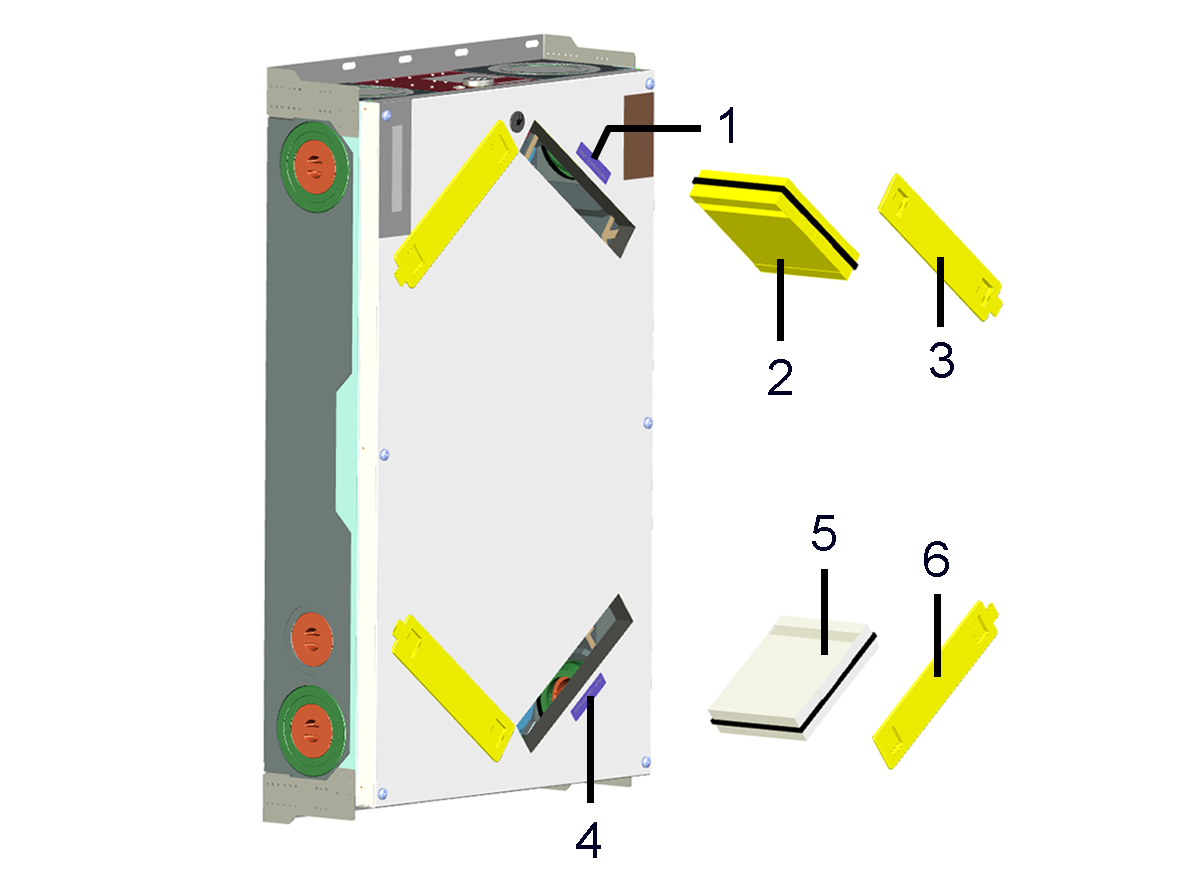
1 | Unit filter sticker |
2 | F7 fine dust filter (pollen filter), filter class ISO ePM1 ≥60 % |
3 | Filter cover |
4 | Unit filter sticker |
5 | M5 unit filter, filter class ISO ePM10 ≥50 % |
6 | Filter cover |
Recommendation: Change the two unit filters together.
- Remove the filter cover from the filter positions marked with the stickers.
- Pull the air filters out of the ventilation unit.
- Carefully slide the new filters into the filter shaft. Do not press filter in (cellulose). Only press in at reinforced corners. Make sure that the air direction arrow is facing downwards.
- Close the filter openings with the filter cover.
- Reset filter change interval.
For single RLS 1 WR control units in solo operation: Press key and at the same time for 2 seconds. The 3 LEDs flash briefly. In the event of a premature reset, press the buttons together for 5 seconds.
Click on the message on a main control unit (RLS T2 WS, web tool, app) and confirm the filter change with changed. Also confirm a premature filter change with changed.
 - Dispose of the air filter according to local regulations.