Changing the RV 2 air filter
ATTENTION: Observe the safety instructions for air filters.
 The air filter change is shown below using the RV 2 parapet variant as an example. Proceed in the same way for the RV 2 soffit variants.
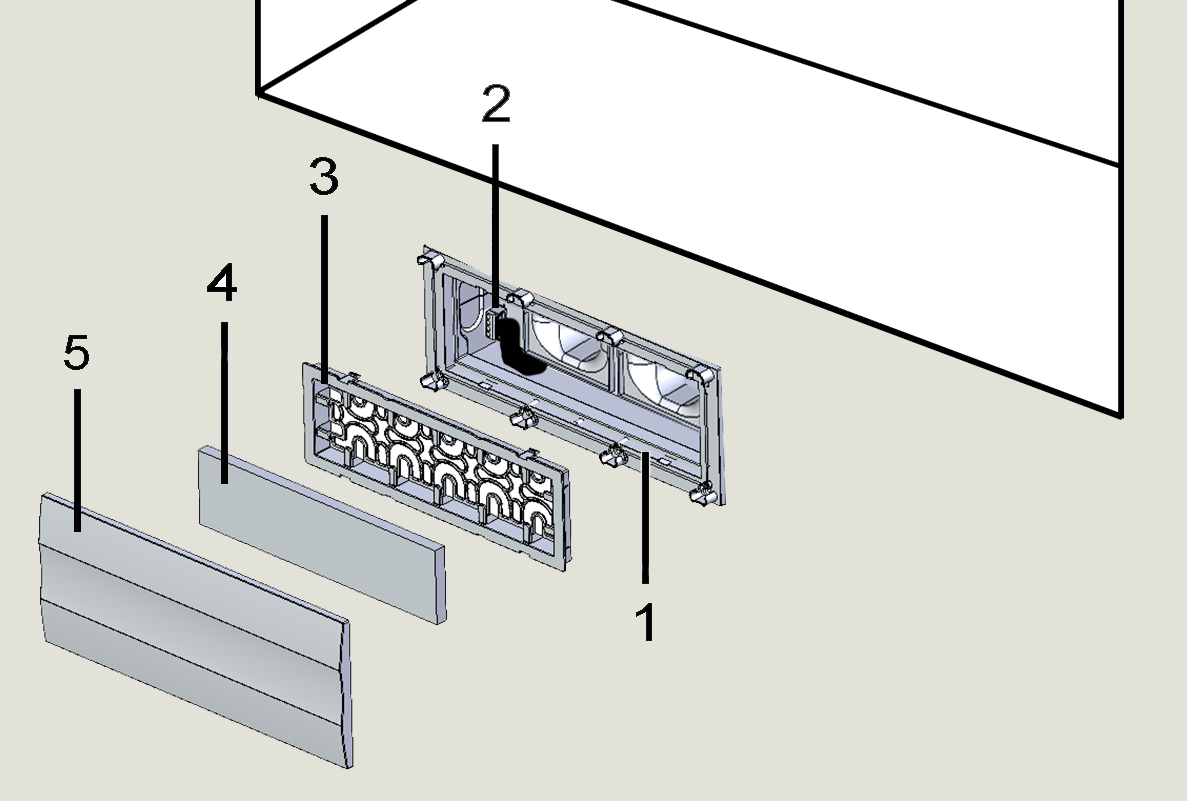
1 | Mounting sleeve |
2 | Connector plug |
3 | Filter frame |
4 | Internal air filter, ISO coarse 45% (G3) |
5 | Internal cover |
- Switch off the mains fuse and secure it against being switched on again.
- Carefully remove the internal cover.
- Remove the internal filter frame: Press the retaining lugs together at the top and bottom and remove the frame.
- Remove the air filter from the filter frame.
- Disconnect the connector plug.
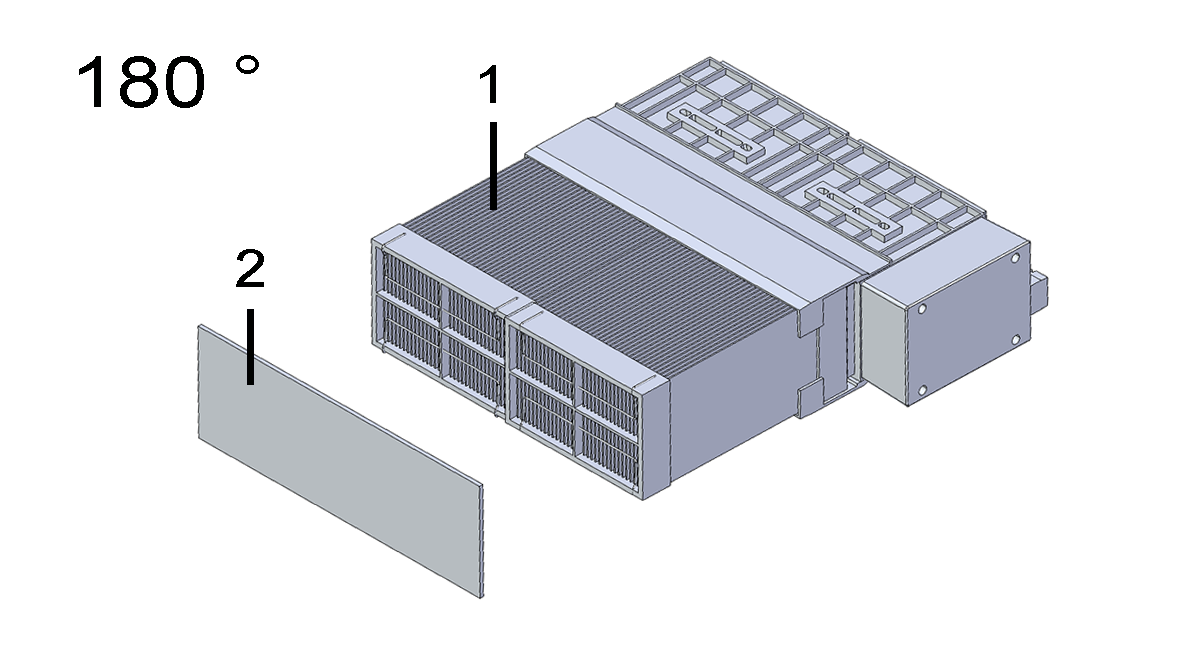
- Reach into the mounting sleeve and carefully pull out the slide-in module on the retaining strap. CAUTION: The slide-in module is difficult to pull out. Make sure that your footing is secure. Do not damage the slide-in module, connection cable and connector plug.

1
Mounting sleeve
2
Slide-in module
- Turn the slide-in module 180° and remove the external filter. To do this, release the 4 retaining brackets on the slide-in module and swivel away.
1
Slide-in module
2
External air filter, ISO coarse 30% (G2)
- Replace the ISO coarse 30% (G2) air filter with a new filter. Only use original air filters.
- Insert the filter flat and secure it with the 4 retaining brackets.
- Carefully push the slide-in module into the mounting sleeve as far as it will go. Do not damage the connection cable.
- Insert the connector plug.
- Replace the ISO coarse 45% (G3) internal air filter with a new one and insert it into the filter holder. Ensure correct, flat position.
- Insert the filter holder into the mounting sleeve.
- Attach the internal cover. Check for correct fit.
- Switch the mains fuse on.
- Acknowledge the filter change on the room air control → Changing air filters.